Part 3: Dependency Management
- Step 0. Before you Begin
- Step 1. Understanding the Version Catalog
- Step 2. Understanding Project Dependencies
- Step 3. Understanding Transitive Dependencies
- Step 4. Viewing Project Dependencies
- Step 5. Viewing Dependencies in a Build Scan®
- Step 6. Updating Project Dependencies
- Step 7. Run the Java app
Learn the basics of project dependencies and Gradle’s dependency management.
Step 1. Understanding the Version Catalog
In Gradle, the dependencies {} block in your build script is where you declare the external libraries, files, or projects your build needs to work.
Each line inside this block tells Gradle two things:
-
What the dependency is (a library like Guava or JUnit, a file, or a project)
-
How and where it’s used (for production code, test code, an API, etc.)
For example:
dependencies {
    implementation("com.google.guava:guava:32.1.2-jre")             (1)
    implementation(project(":utils"))                               (2)
    runtimeOnly(files("some.jar"))                                  (3)
    testImplementation("org.junit.jupiter:junit-jupiter:5.10.1")    (4)
}dependencies {
implementation 'com.google.guava:guava:32.1.2-jre' (1)
implementation project(':utils') (2)
runtimeOnly files('some.jar') (3)
testImplementation 'org.junit.jupiter:junit-jupiter:5.10.1' (4)
}| 1 | External dependency — Gradle resolves com.google.guava:guava:32.1.2-jre from your declared repositories and adds it to this project’s compile and runtime classpaths. |
| 2 | Project dependency — The project depends on the sibling project :utils. Gradle wires task dependencies so :utils is built first and puts its main outputs on this project’s compile and runtime classpaths. |
| 3 | Local file dependency — Adds a local JAR only to the runtime classpath (not available at compile time). |
| 4 | External dependency — testImplementation is available only to the test source set (compile + runtime). It is not on the production runtime classpath. |
In part 1, Gradle init created a project that uses version catalogs.
A version catalog is a central file that defines library versions and aliases you can use throughout your build. It helps keep your dependencies consistent across subprojects and avoids repeating version numbers.
The version catalog is located at gradle/libs.versions.toml:
[versions]
guava = "33.3.1-jre"
junit-jupiter = "5.11.3"

[libraries]
guava = { module = "com.google.guava:guava", version.ref = "guava" }
junit-jupiter = { module = "org.junit.jupiter:junit-jupiter", version.ref = "junit-jupiter" }
Once defined, you can reference these libraries in your build.gradle(.kts) files using the libs accessor.
This is why our build script actually looks like this:
dependencies {  (2)
    // Use JUnit Jupiter for testing.
    testImplementation(libs.junit.jupiter)

    testRuntimeOnly("org.junit.platform:junit-platform-launcher")

    // This dependency is used by the application.
    implementation(libs.guava)
}dependencies { (2)
// Use JUnit Jupiter for testing.
testImplementation libs.junit.jupiter
testRuntimeOnly 'org.junit.platform:junit-platform-launcher'
// This dependency is used by the application.
implementation libs.guava
}
The libs.junit.jupiter syntax is used because the key contains a hyphen which is a special character.
|
A version catalog provides a number of advantages over declaring dependencies directly in build scripts:
-
Gradle generates type-safe accessors from the catalog so that you can easily add dependencies with autocompletion in the IDE.
-
It is a central place to declare a version of a dependency so that any changes apply to every subproject.
Step 2. Understanding Project Dependencies
Gradle provides excellent support for dependency management and automation.
Let’s take another look at our build script, specifically the following section:
repositories {
// Use Maven Central for resolving dependencies.
mavenCentral()
}
dependencies { (2)
// Use JUnit Jupiter for testing.
testImplementation(libs.junit.jupiter)
testRuntimeOnly("org.junit.platform:junit-platform-launcher")
// This dependency is used by the application.
implementation(libs.guava)
}repositories {
// Use Maven Central for resolving dependencies.
mavenCentral()
}
dependencies {  (2)
    // Use JUnit Jupiter for testing.
    testImplementation libs.junit.jupiter

    testRuntimeOnly 'org.junit.platform:junit-platform-launcher'

    // This dependency is used by the application.
    implementation libs.guava
}Some key concepts in Gradle dependency management include:
- Repositories
-
The source of dependencies →
mavenCentral()in our app. - Dependencies
-
Dependencies declared via configuration types →
libs.junit.jupiterandlibs.guavain our app.
The Maven Central repository is a collection of jar files, plugins, and libraries provided by the Maven community and backed by Sonatype. It is the de-facto public artifact store for Java and is used by many build systems.
Gradle needs specific information, called GAV coordinates, to locate and download a dependency.
GAV stands for Group, Artifact, and Version — three pieces of information that uniquely identify a library in a repository.
Let’s look at libs.guava and libs.junit.jupiter:
| Description | com.google.guava:guava:33.3.1-jre | org.junit.jupiter:junit-jupiter-api:5.11.3 | |
|---|---|---|---|
Group |
identifier of an organization |
|
|
Artifact (Name) |
dependency identifier |
|
|
Version |
version # to import |
|
|
Step 3. Understanding Transitive Dependencies
A transitive dependency is a dependency of a dependency.
For our guava dependency to work, it requires a library called failureaccess.
Therefore failureaccess is a transitive dependency of the project.
Step 4. Viewing Project Dependencies
You can view your dependency tree in the terminal using the ./gradlew :app:dependencies command:
$ ./gradlew :app:dependencies> Task :app:dependencies
------------------------------------------------------------
Project ':app'
------------------------------------------------------------
...
runtimeClasspath - Runtime classpath of source set 'main'.
\--- com.google.guava:guava:33.3.1-jre
+--- com.google.guava:failureaccess:1.0.2
+--- com.google.guava:listenablefuture:9999.0-empty-to-avoid-conflict-with-guava
+--- com.google.code.findbugs:jsr305:3.0.2
+--- org.checkerframework:checker-qual:3.43.0
+--- com.google.errorprone:error_prone_annotations:2.28.0
\--- com.google.j2objc:j2objc-annotations:3.0.0
testRuntimeClasspath - Runtime classpath of source set 'test'.
+--- com.google.guava:guava:33.3.1-jre
| +--- com.google.guava:failureaccess:1.0.2
| +--- com.google.guava:listenablefuture:9999.0-empty-to-avoid-conflict-with-guava
| +--- com.google.code.findbugs:jsr305:3.0.2
| +--- org.checkerframework:checker-qual:3.43.0
| +--- com.google.errorprone:error_prone_annotations:2.28.0
| \--- com.google.j2objc:j2objc-annotations:3.0.0
+--- org.junit.jupiter:junit-jupiter:5.11.3
| +--- org.junit:junit-bom:5.11.3
| | +--- org.junit.jupiter:junit-jupiter:5.11.3 (c)
| | +--- org.junit.jupiter:junit-jupiter-api:5.11.3 (c)
| | +--- org.junit.jupiter:junit-jupiter-engine:5.11.3 (c)
| | +--- org.junit.jupiter:junit-jupiter-params:5.11.3 (c)
| | +--- org.junit.platform:junit-platform-launcher:1.11.3 (c)
| | +--- org.junit.platform:junit-platform-commons:1.11.3 (c)
| | \--- org.junit.platform:junit-platform-engine:1.11.3 (c)
| +--- org.junit.jupiter:junit-jupiter-api:5.11.3
| | +--- org.junit:junit-bom:5.11.3 (*)
| | +--- org.opentest4j:opentest4j:1.3.0
| | \--- org.junit.platform:junit-platform-commons:1.11.3
| | \--- org.junit:junit-bom:5.11.3 (*)
| +--- org.junit.jupiter:junit-jupiter-params:5.11.3
| | +--- org.junit:junit-bom:5.11.3 (*)
| | \--- org.junit.jupiter:junit-jupiter-api:5.11.3 (*)
| \--- org.junit.jupiter:junit-jupiter-engine:5.11.3
| +--- org.junit:junit-bom:5.11.3 (*)
| +--- org.junit.platform:junit-platform-engine:1.11.3
| | +--- org.junit:junit-bom:5.11.3 (*)
| | +--- org.opentest4j:opentest4j:1.3.0
| | \--- org.junit.platform:junit-platform-commons:1.11.3 (*)
| \--- org.junit.jupiter:junit-jupiter-api:5.11.3 (*)
\--- org.junit.platform:junit-platform-launcher -> 1.11.3
+--- org.junit:junit-bom:5.11.3 (*)
\--- org.junit.platform:junit-platform-engine:1.11.3 (*)The output clearly depicts that com.google.guava:guava:33.3.1-jre has a dependency on com.google.guava:failureaccess:1.0.2.
Step 5. Viewing Dependencies in a Build Scan®
To view dependencies using a Build Scan, run the build task with an optional --scan flag.
In the tutorial directory, enter the command below and follow the prompt to accept the terms:
$ ./gradlew build --scanBUILD SUCCESSFUL in 423ms
7 actionable tasks: 7 up-to-date
Publishing a Build Scan to scans.gradle.com requires accepting the Gradle Terms of Service defined at https://gradle.com/terms-of-service. Do you accept these terms? [yes, no] yes
Gradle Terms of Service accepted.
Publishing Build Scan...
https://gradle.com/s/linkA Build Scan is a shareable and centralized record of a build and is available as a free service from Gradle.
Click the link provided in the prompt: https://gradle.com/s/link.
| You will have to accept the terms of service to use Build Scan. |
You will need to activate the Build Scan by using your email:
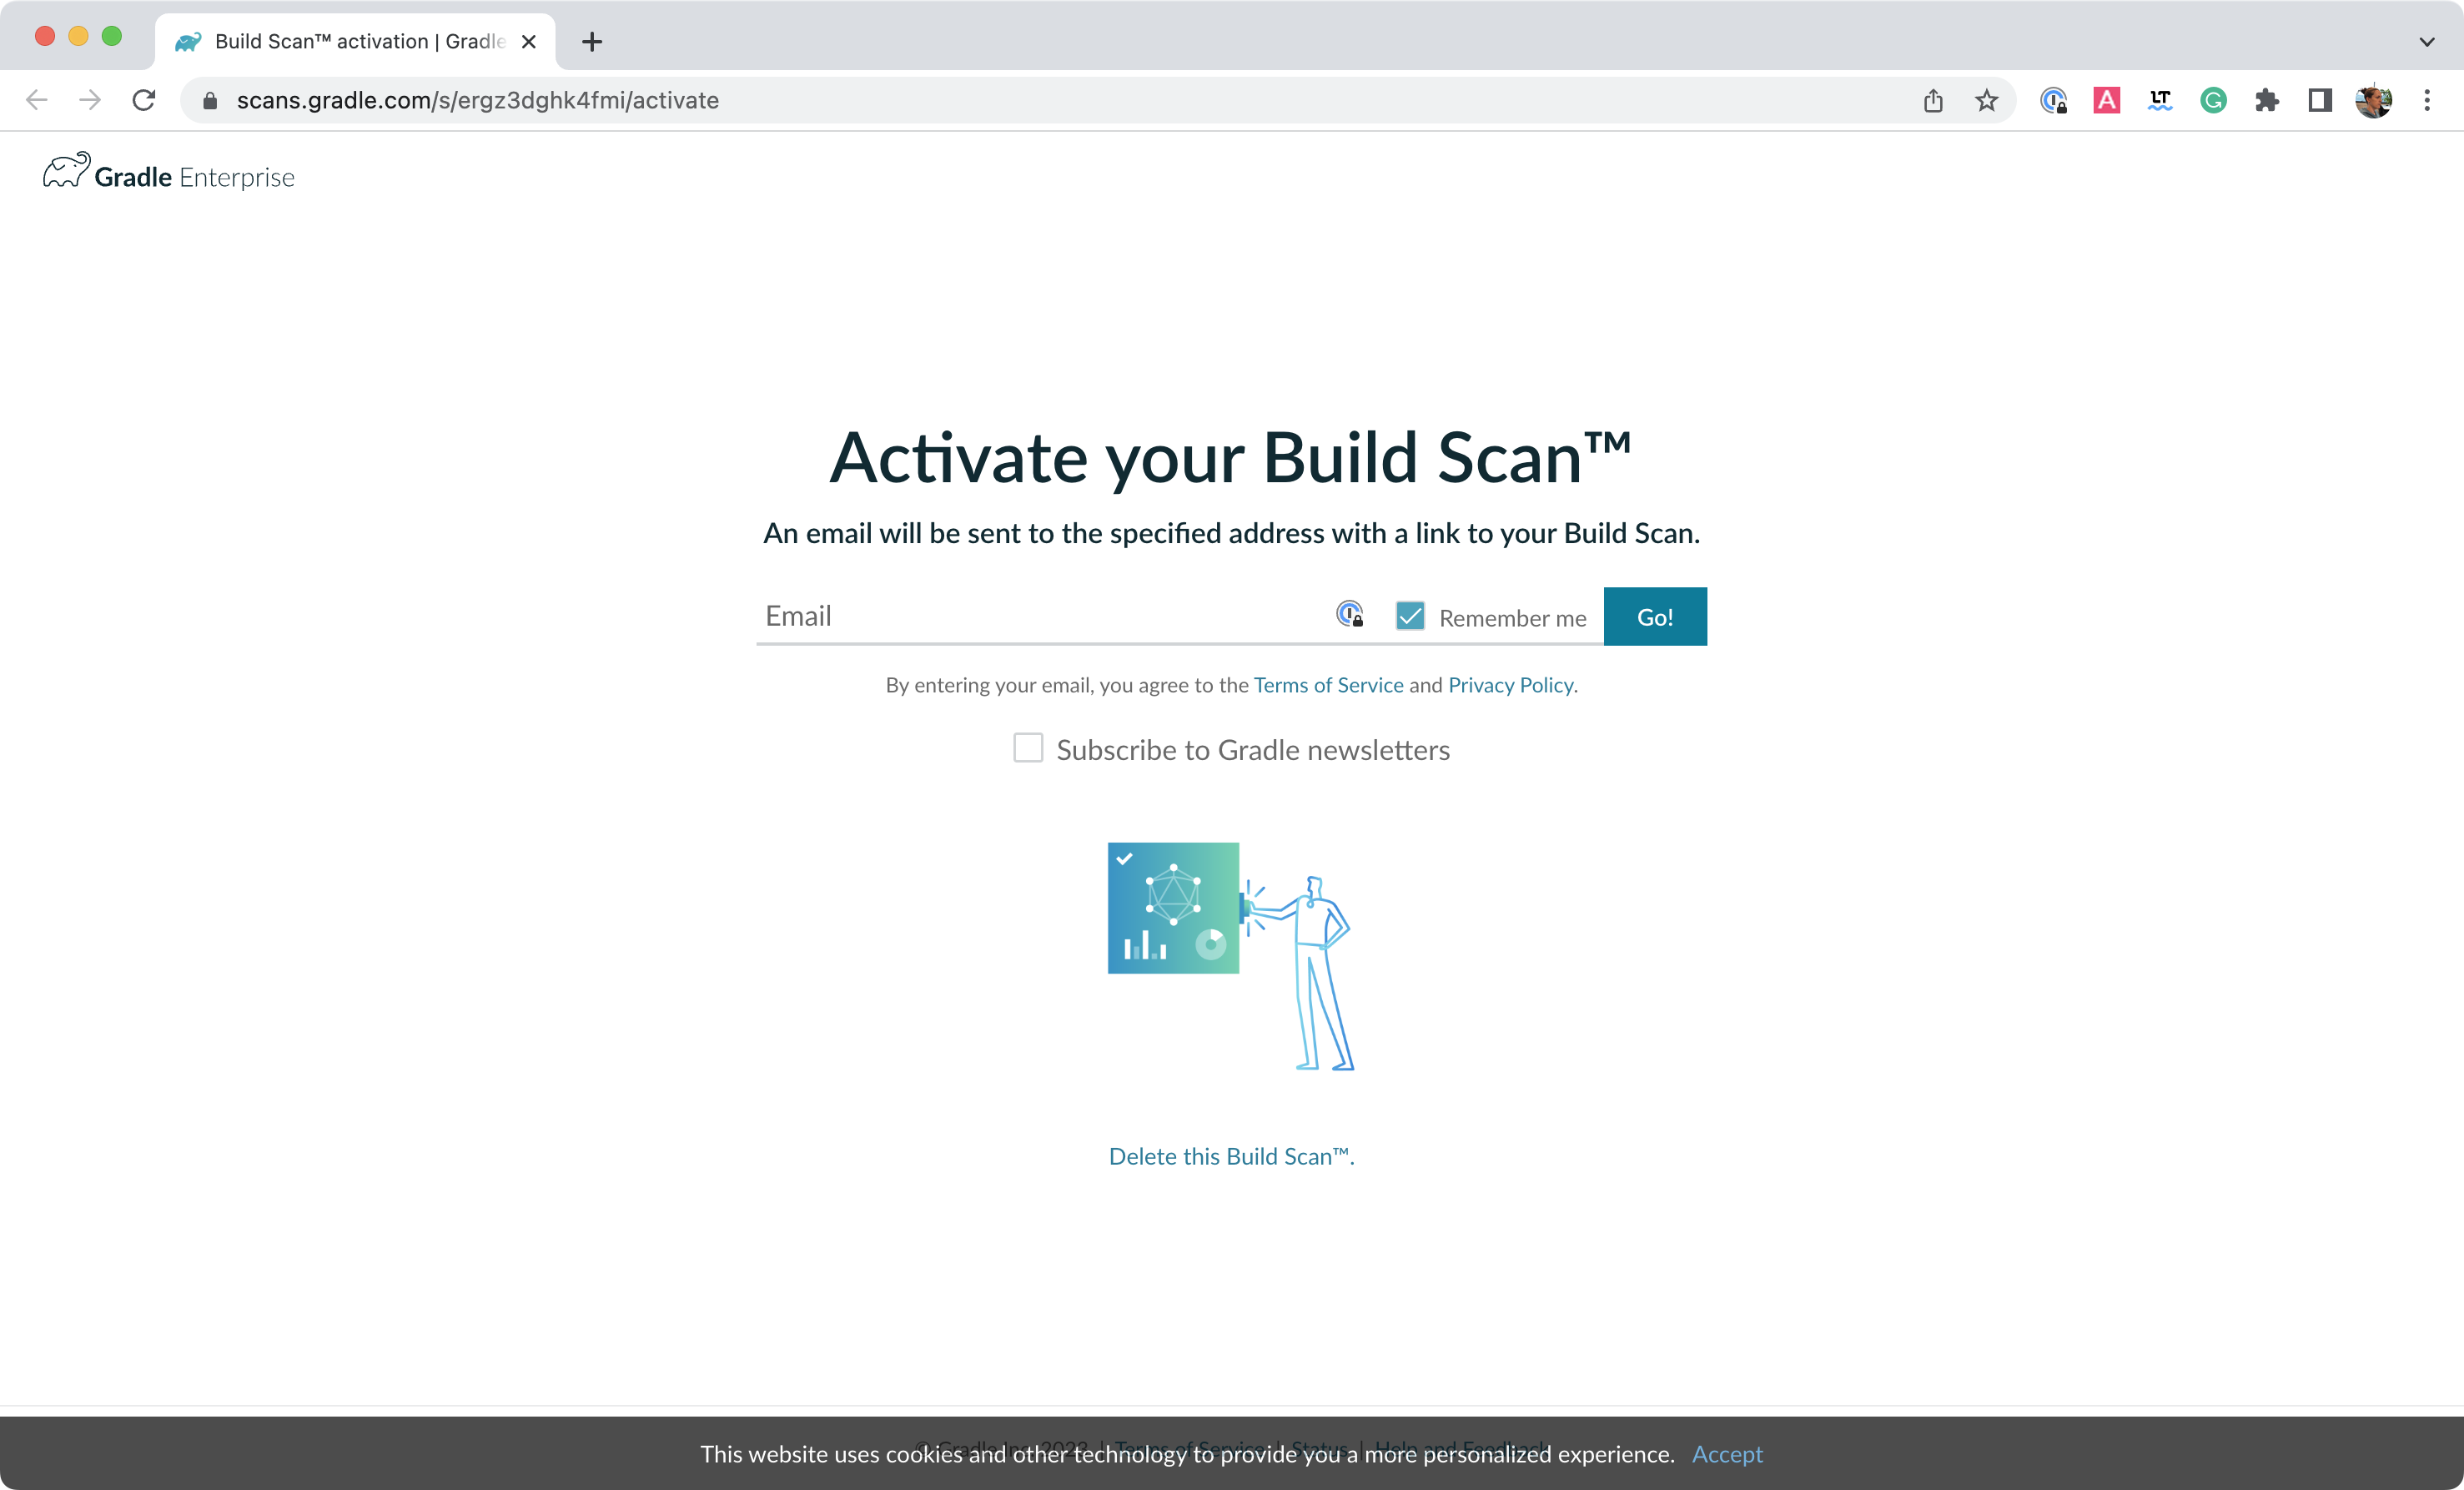
You will receive the final link to the scan in your inbox which should look as follows:

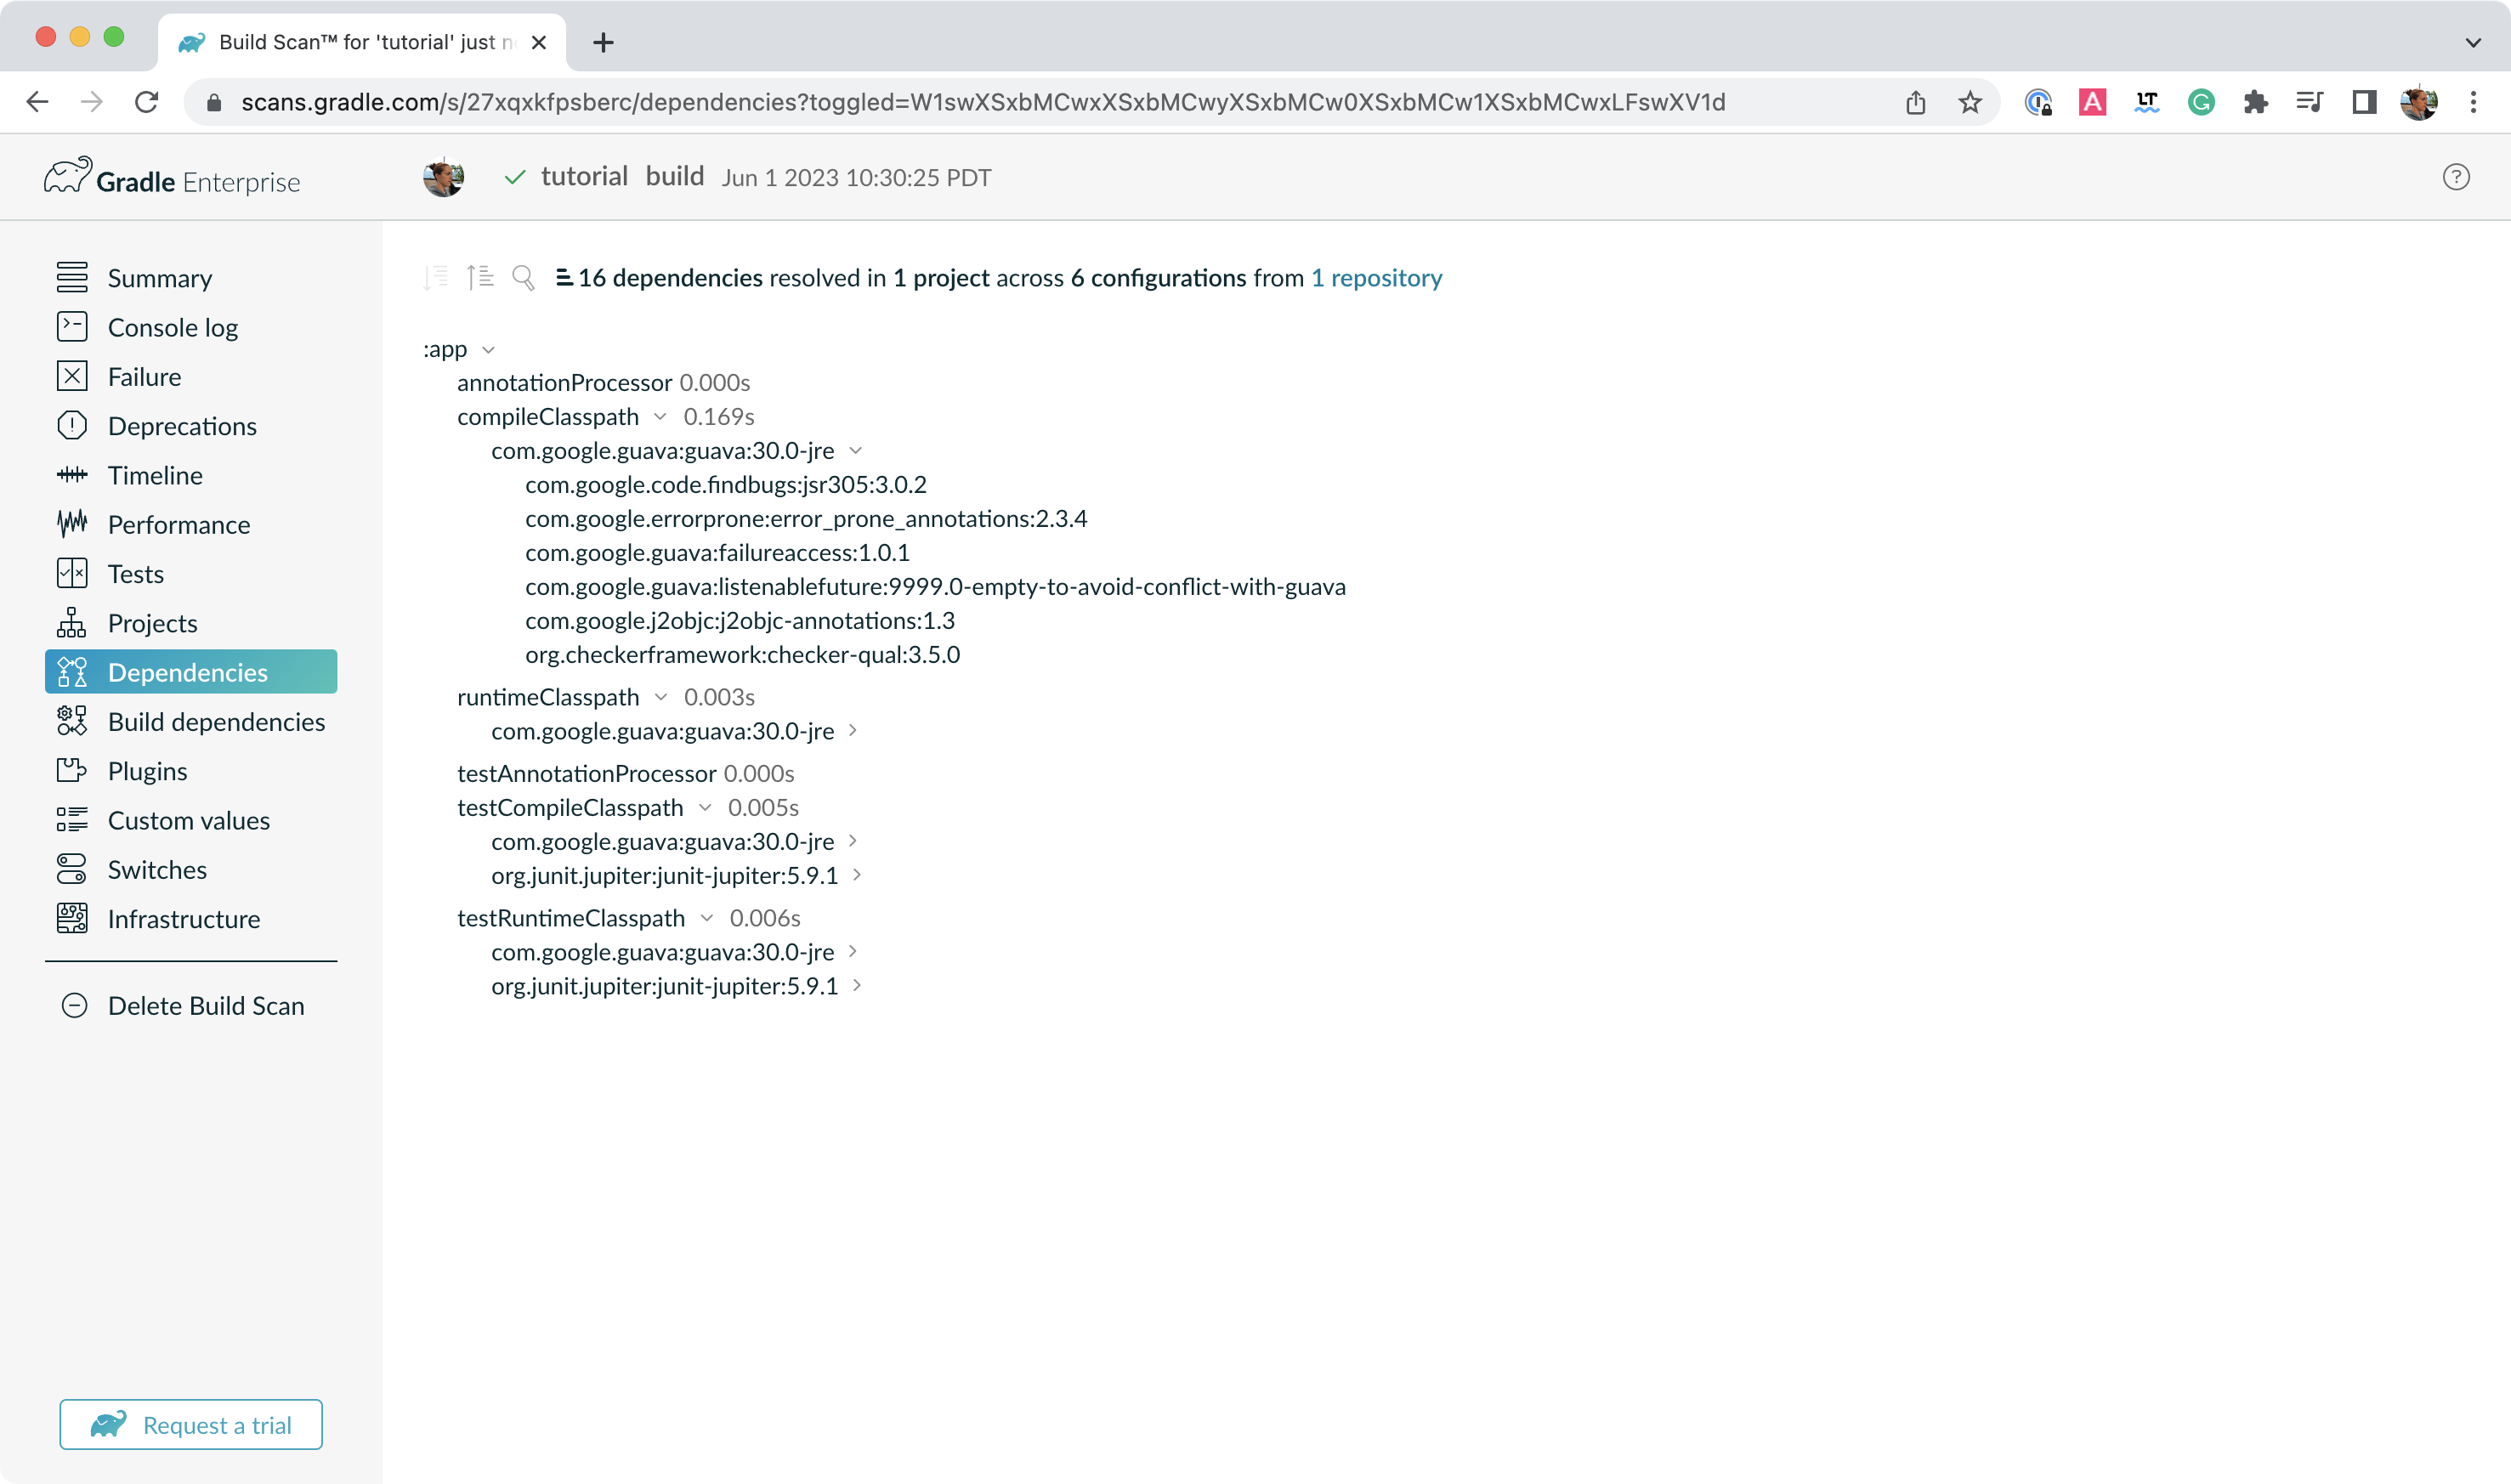
Open the Dependencies tab in the menu and expand compileClasspath, runtimeClasspath, testCompileClasspath, and testRuntimeClasspath:
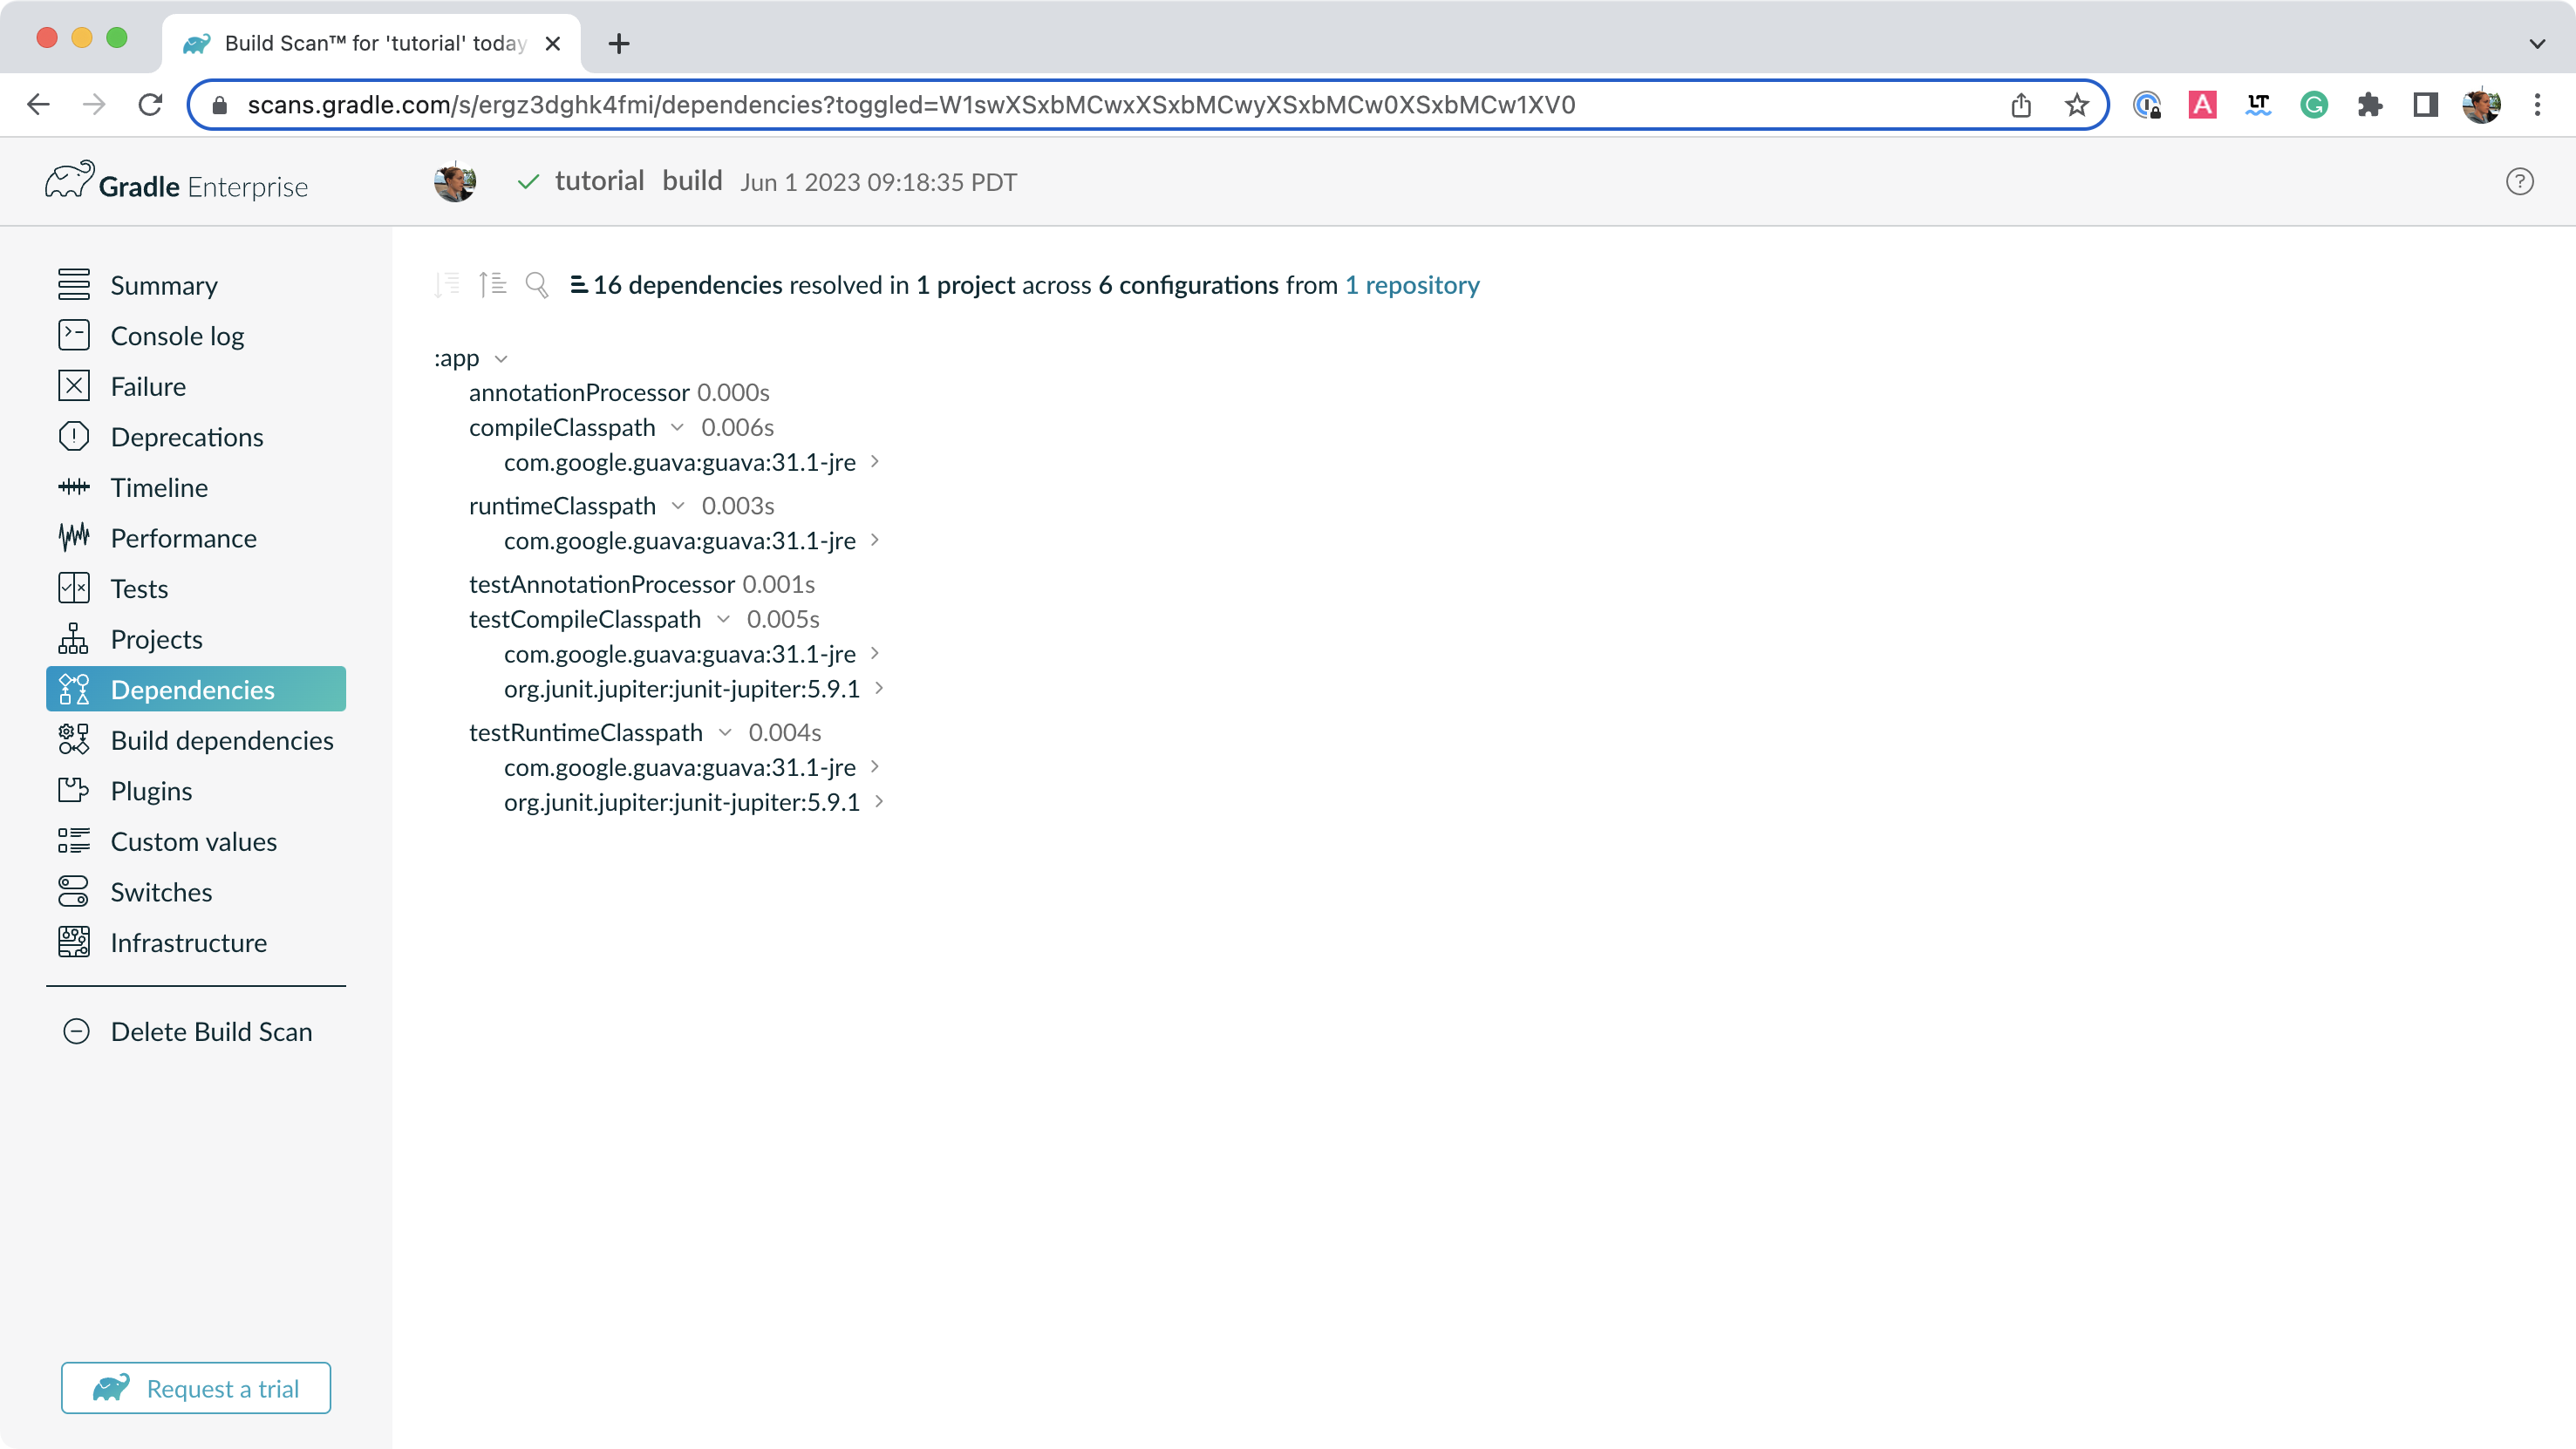
As expected, we can see the declared dependencies junit and guava are used by Gradle to compile, run, and test the app.
Expand com.google.guava:guava:33.3.1-jre and org.junit.jupiter:junit-jupiter:5.11.3 in the window:
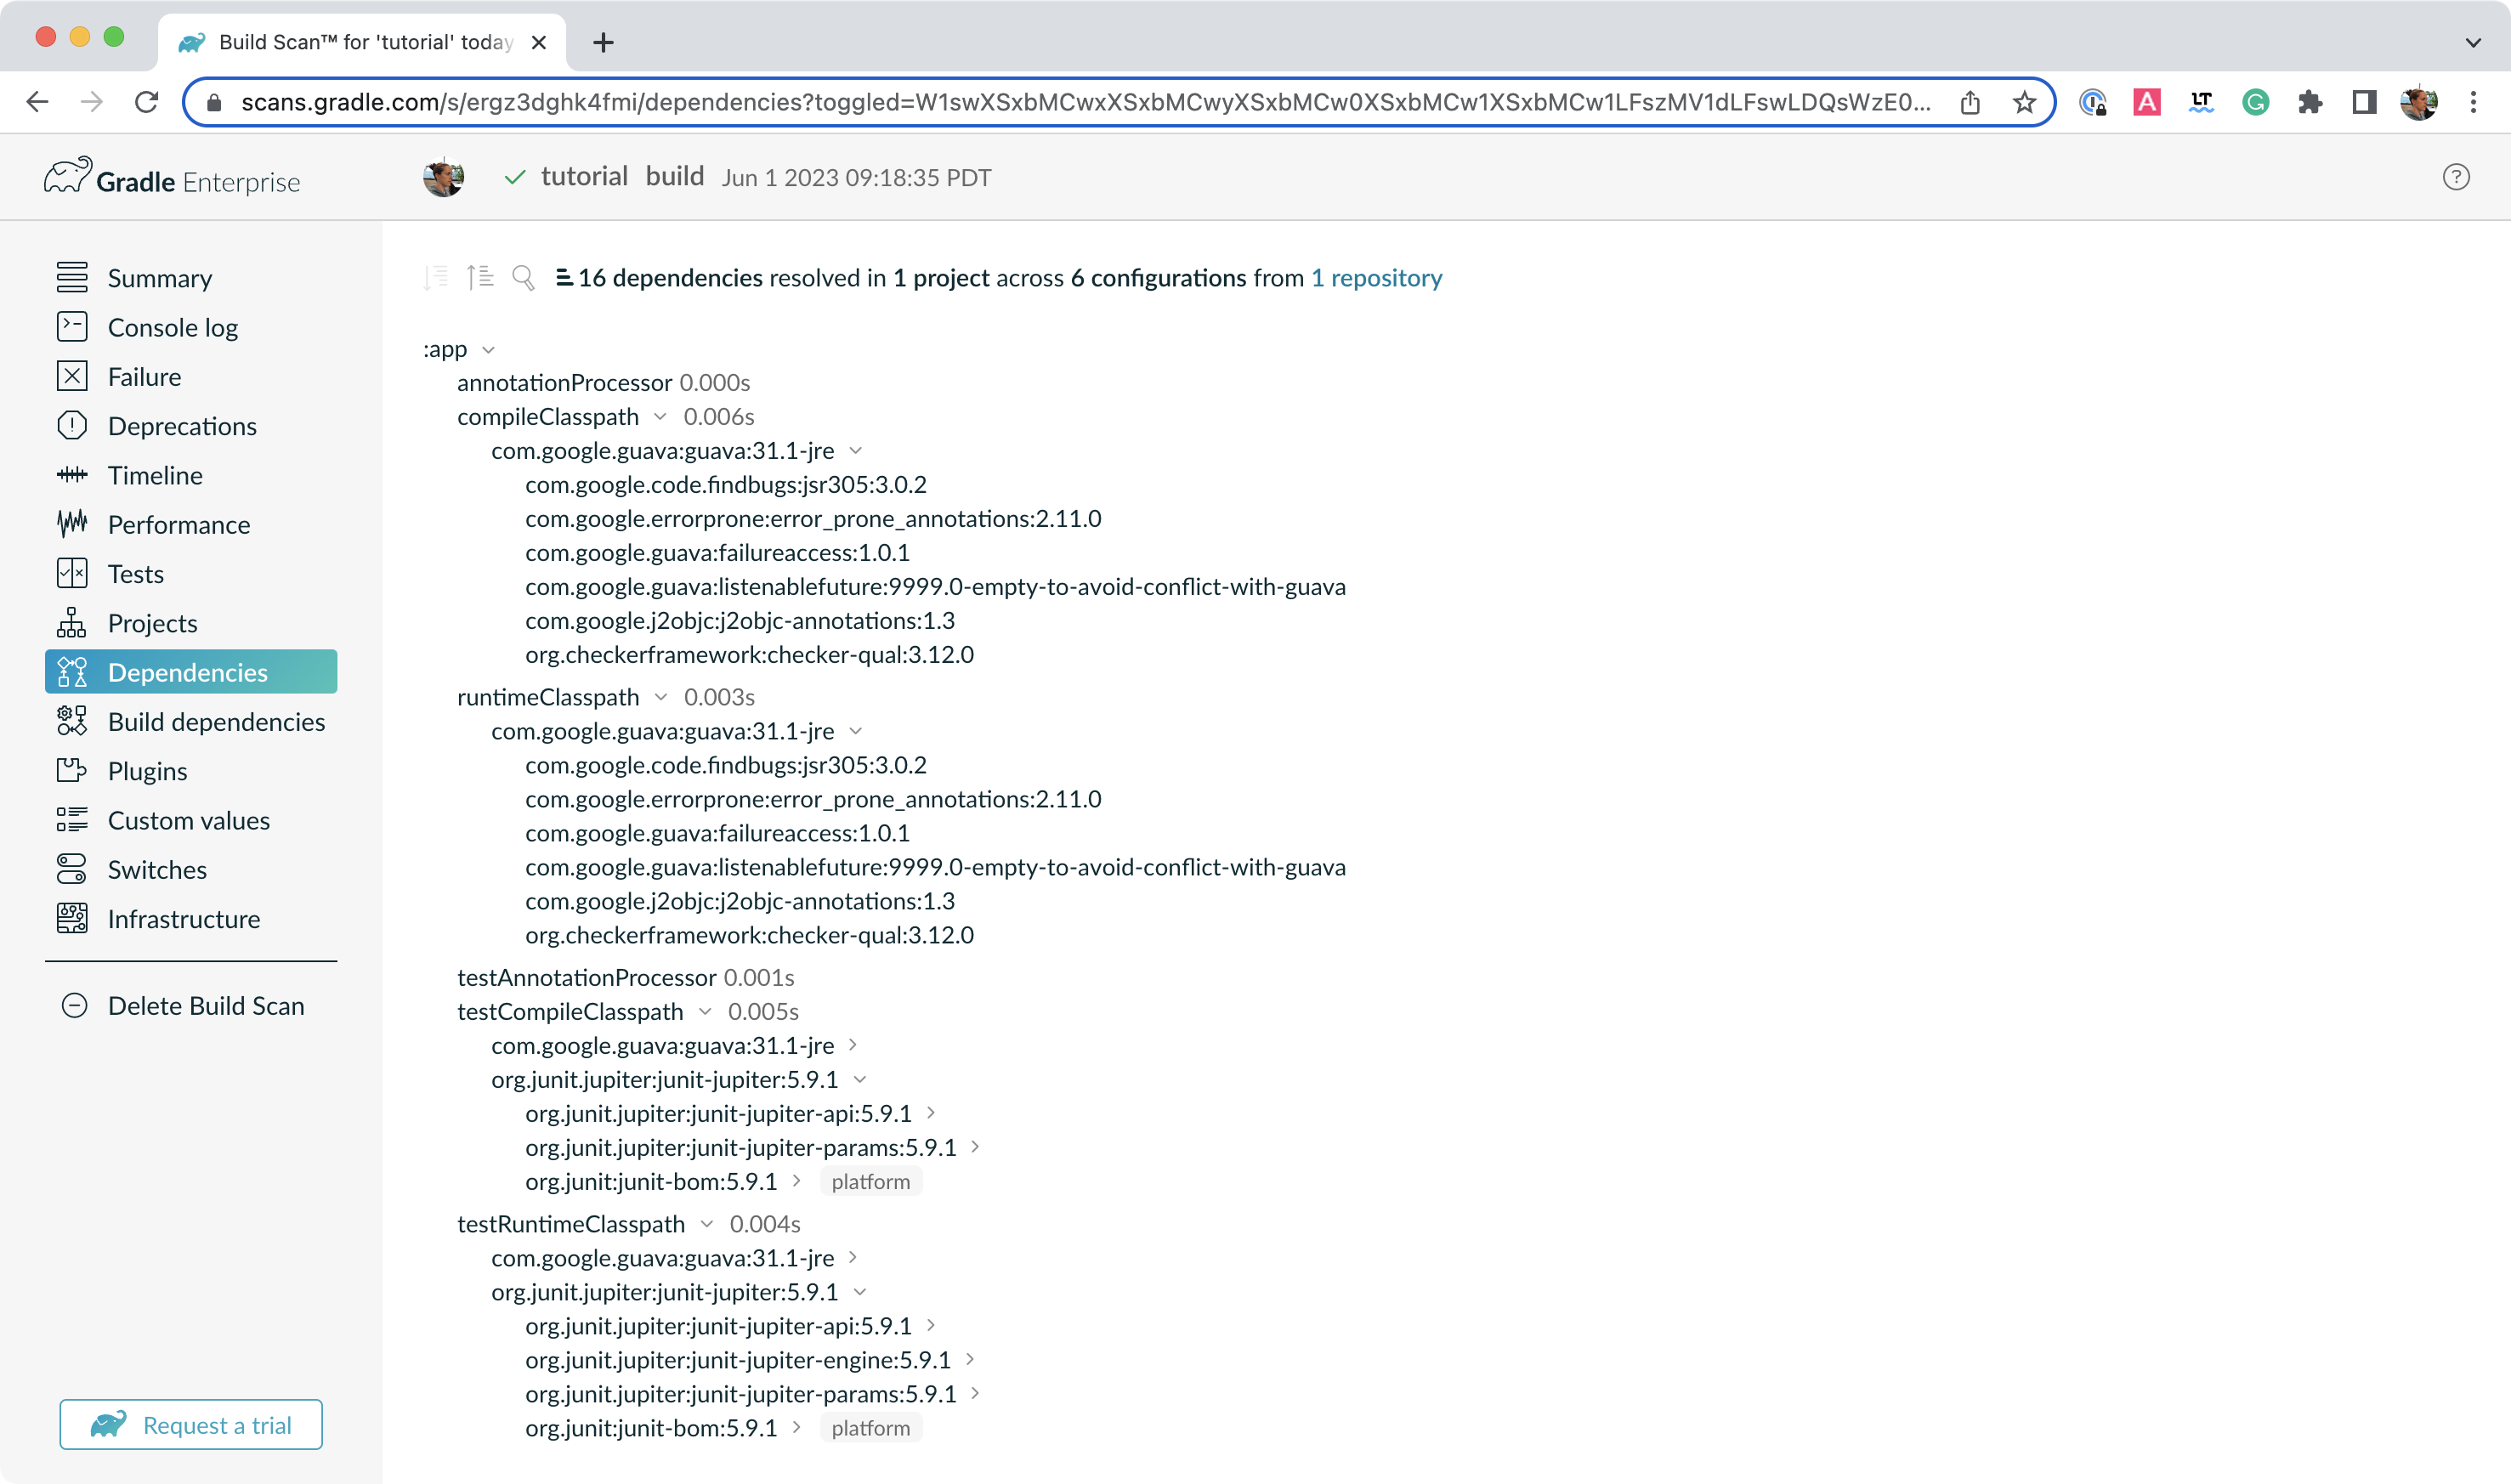
There are several transitive dependencies under junit and guava.
For example, the com.google.code.findbugs:jsr305:3.0.2 transitive dependency comes from the com.google.guava:guava:33.3.1-jre dependency.
Step 6. Updating Project Dependencies
Adding and changing dependencies is done in the build file and in the version catalog.
Let’s change the guava version and look at how this affects the dependency tree.
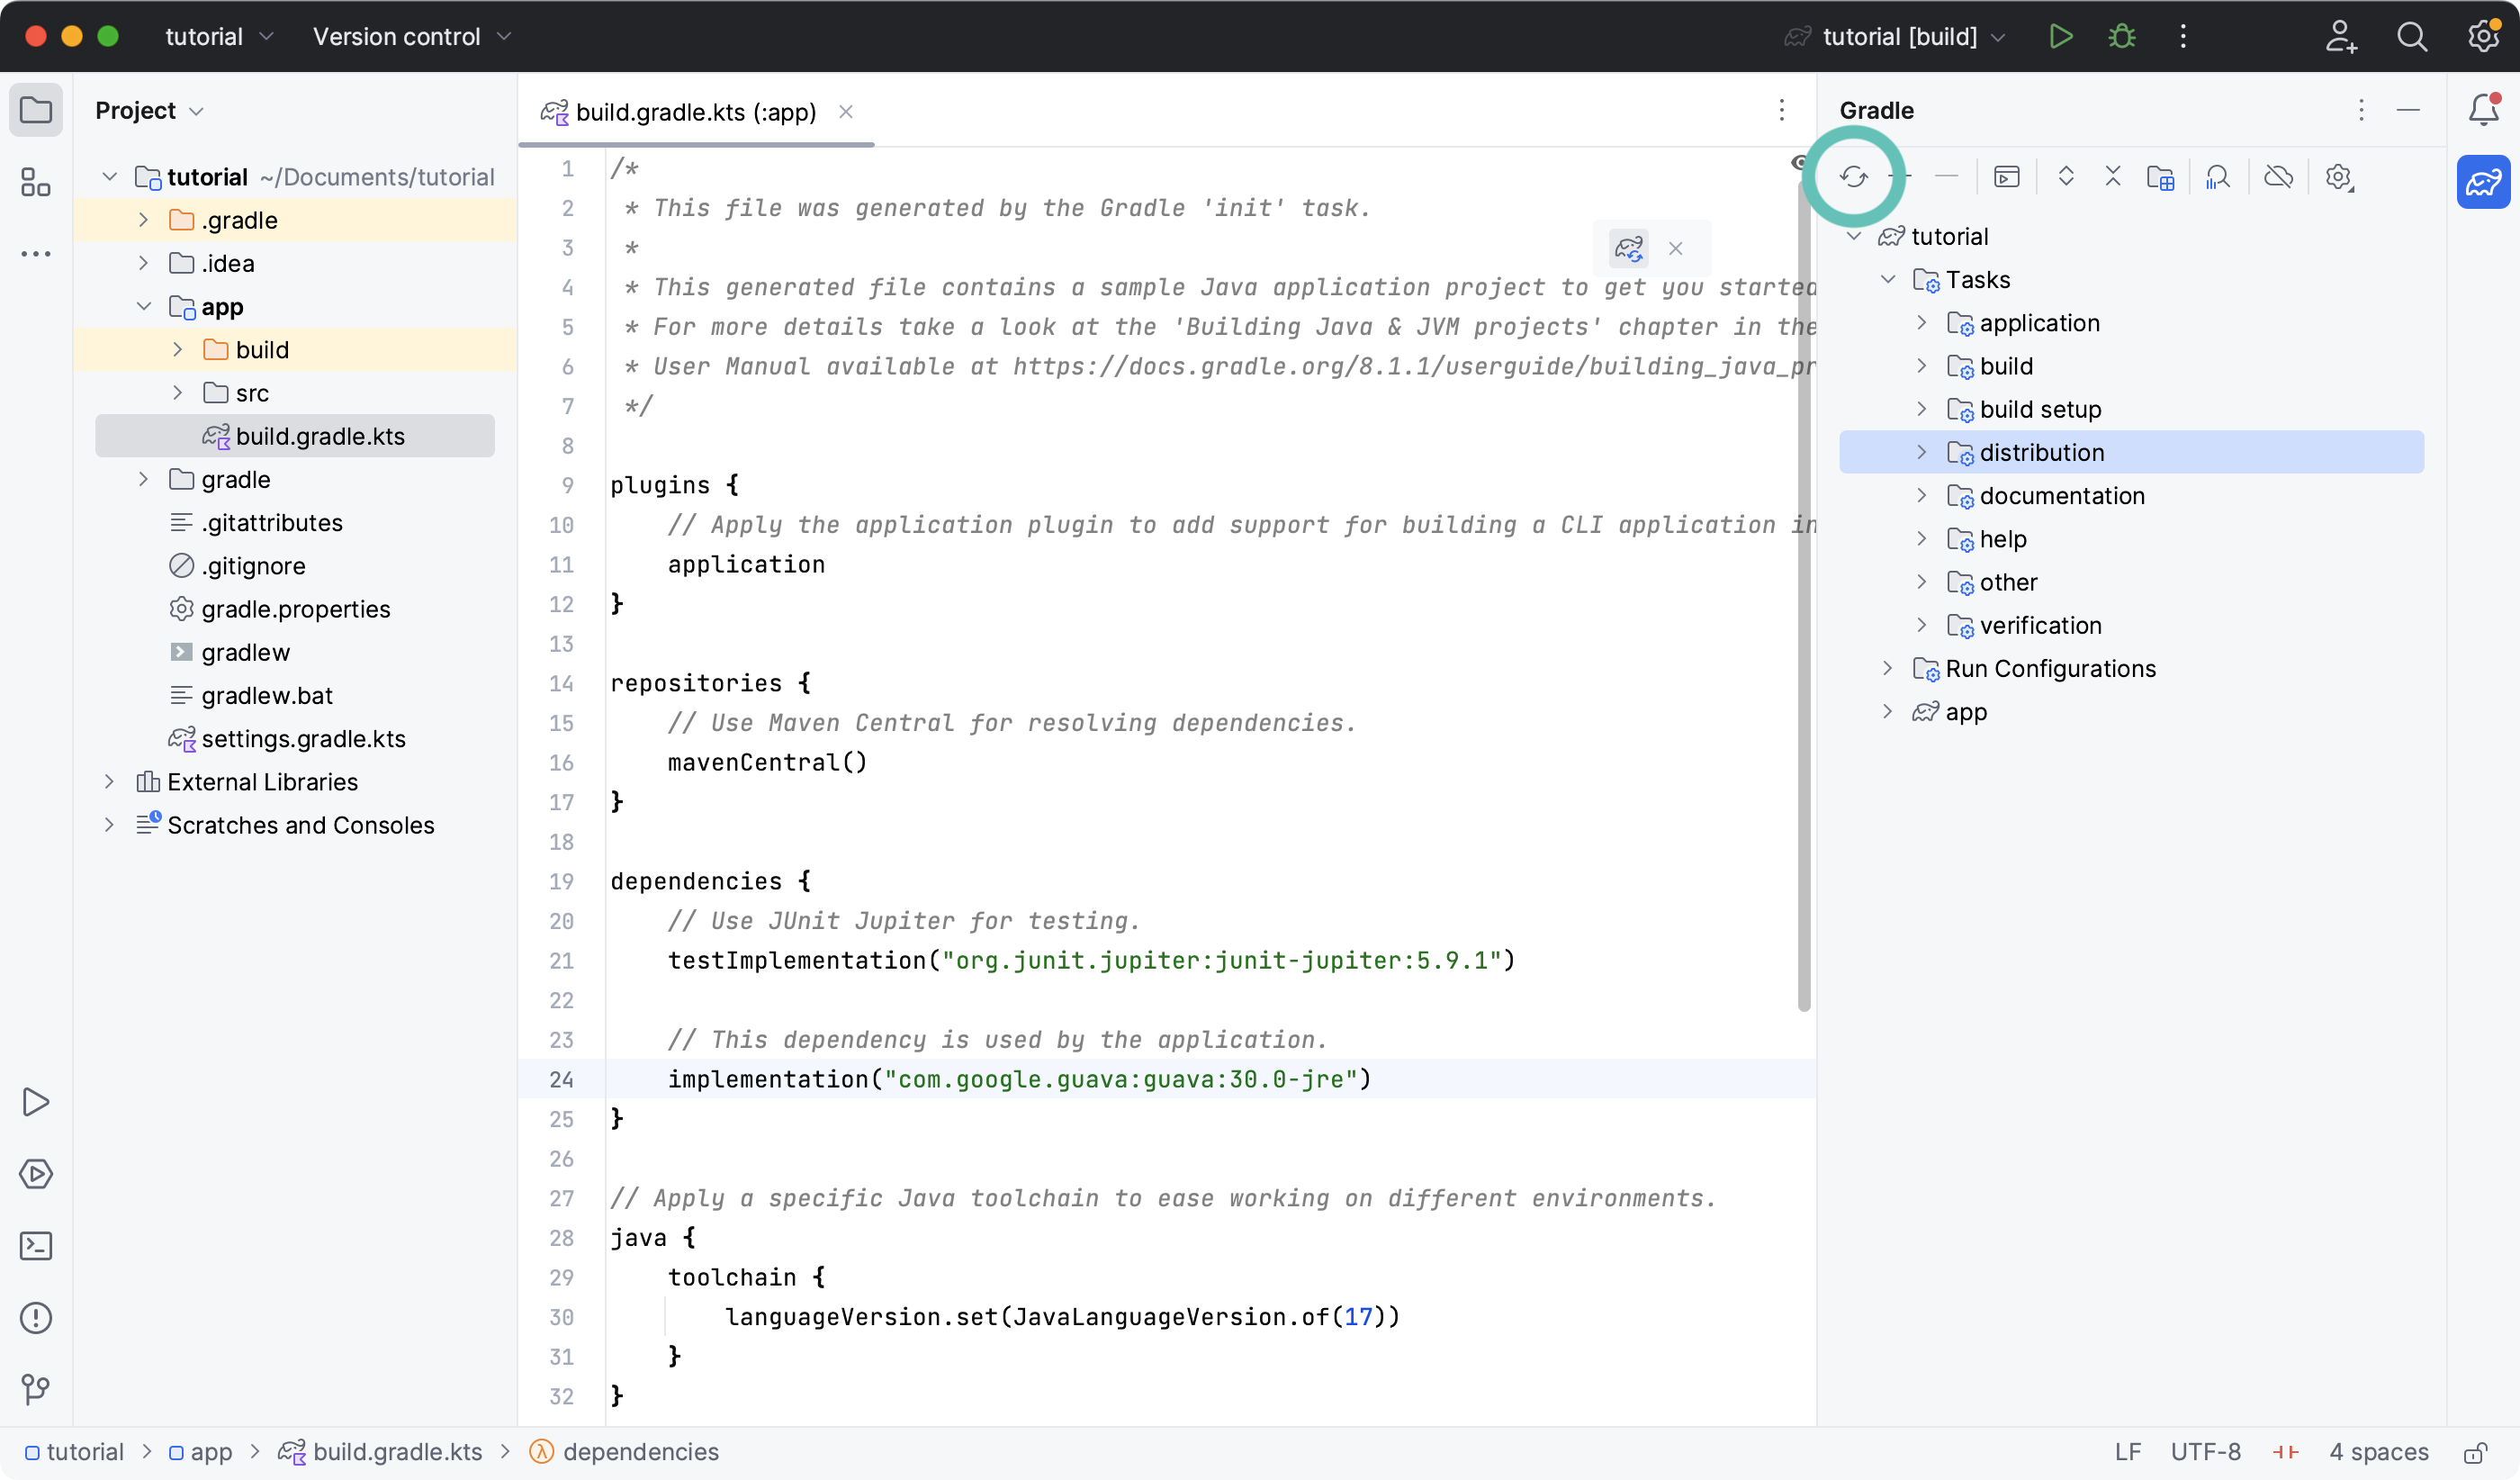
Change the guava dependency in the version catalog to:
[versions]
guava = "30.0-jre"
junit-jupiter = "5.11.3"

[libraries]
guava = { module = "com.google.guava:guava", version.ref = "guava" }
junit-jupiter = { module = "org.junit.jupiter:junit-jupiter", version.ref = "junit-jupiter" }
If you change the file using IntelliJ, don’t forget to click the sync Gradle button:
Run ./gradlew build --scan and view the Build Scan results:
Run ./gradlew :app:dependencies in the terminal to check the changes in the dependency tree:
...

testRuntimeClasspath - Runtime classpath of source set 'test'.
+--- com.google.guava:guava:30.0-jre
|    +--- com.google.guava:failureaccess:1.0.1
|    +--- com.google.guava:listenablefuture:9999.0-empty-to-avoid-conflict-with-guava
|    +--- com.google.code.findbugs:jsr305:3.0.2
|    +--- org.checkerframework:checker-qual:3.5.0
|    +--- com.google.errorprone:error_prone_annotations:2.3.4
|    \--- com.google.j2objc:j2objc-annotations:1.3
+--- org.junit.jupiter:junit-jupiter:5.11.3
|    +--- org.junit:junit-bom:5.11.3
|    |    +--- org.junit.jupiter:junit-jupiter:5.11.3 (c)
|    |    +--- org.junit.jupiter:junit-jupiter-api:5.11.3 (c)
|    |    +--- org.junit.jupiter:junit-jupiter-engine:5.11.3 (c)
|    |    +--- org.junit.jupiter:junit-jupiter-params:5.11.3 (c)
|    |    +--- org.junit.platform:junit-platform-launcher:1.11.3 (c)
|    |    +--- org.junit.platform:junit-platform-commons:1.11.3 (c)
|    |    \--- org.junit.platform:junit-platform-engine:1.11.3 (c)
|    +--- org.junit.jupiter:junit-jupiter-api:5.11.3
|    |    +--- org.junit:junit-bom:5.11.3 (*)
|    |    +--- org.opentest4j:opentest4j:1.3.0
|    |    \--- org.junit.platform:junit-platform-commons:1.11.3
|    |         \--- org.junit:junit-bom:5.11.3 (*)
|    +--- org.junit.jupiter:junit-jupiter-params:5.11.3
|    |    +--- org.junit:junit-bom:5.11.3 (*)
|    |    \--- org.junit.jupiter:junit-jupiter-api:5.11.3 (*)
|    \--- org.junit.jupiter:junit-jupiter-engine:5.11.3
|         +--- org.junit:junit-bom:5.11.3 (*)
|         +--- org.junit.platform:junit-platform-engine:1.11.3
|         |    +--- org.junit:junit-bom:5.11.3 (*)
|         |    +--- org.opentest4j:opentest4j:1.3.0
|         |    \--- org.junit.platform:junit-platform-commons:1.11.3 (*)
|         \--- org.junit.jupiter:junit-jupiter-api:5.11.3 (*)
\--- org.junit.platform:junit-platform-launcher -> 1.11.3
     +--- org.junit:junit-bom:5.11.3 (*)
     \--- org.junit.platform:junit-platform-engine:1.11.3 (*)
It is clear the guava dependency has been updated to version 30.0 and the transitive dependencies have changed as well.
Step 7. Run the Java app
Finally, make sure everything is working using the run task, either in your terminal or IDE:
$ ./gradlew run> Task :app:compileJava UP-TO-DATE
> Task :app:processResources NO-SOURCE
> Task :app:classes UP-TO-DATE
> Task :app:run
Hello World!Next Step: Applying Plugins >>