Dependency resolution in Gradle can largely be thought of as a two-step process.
First, the graph resolution phase constructs the dependency graph based on declared dependencies. Second, the artifact resolution phase fetches the actual files (artifacts) for the resolved components:
-
Graph resolution phase:
-
Driven by declared dependencies and their metadata
-
Uses the request attributes defined by the configuration being resolved
-
-
Artifact resolution phase:
-
Based on nodes in the resolved dependency graph
-
Matches each node to a variant and an artifact
-
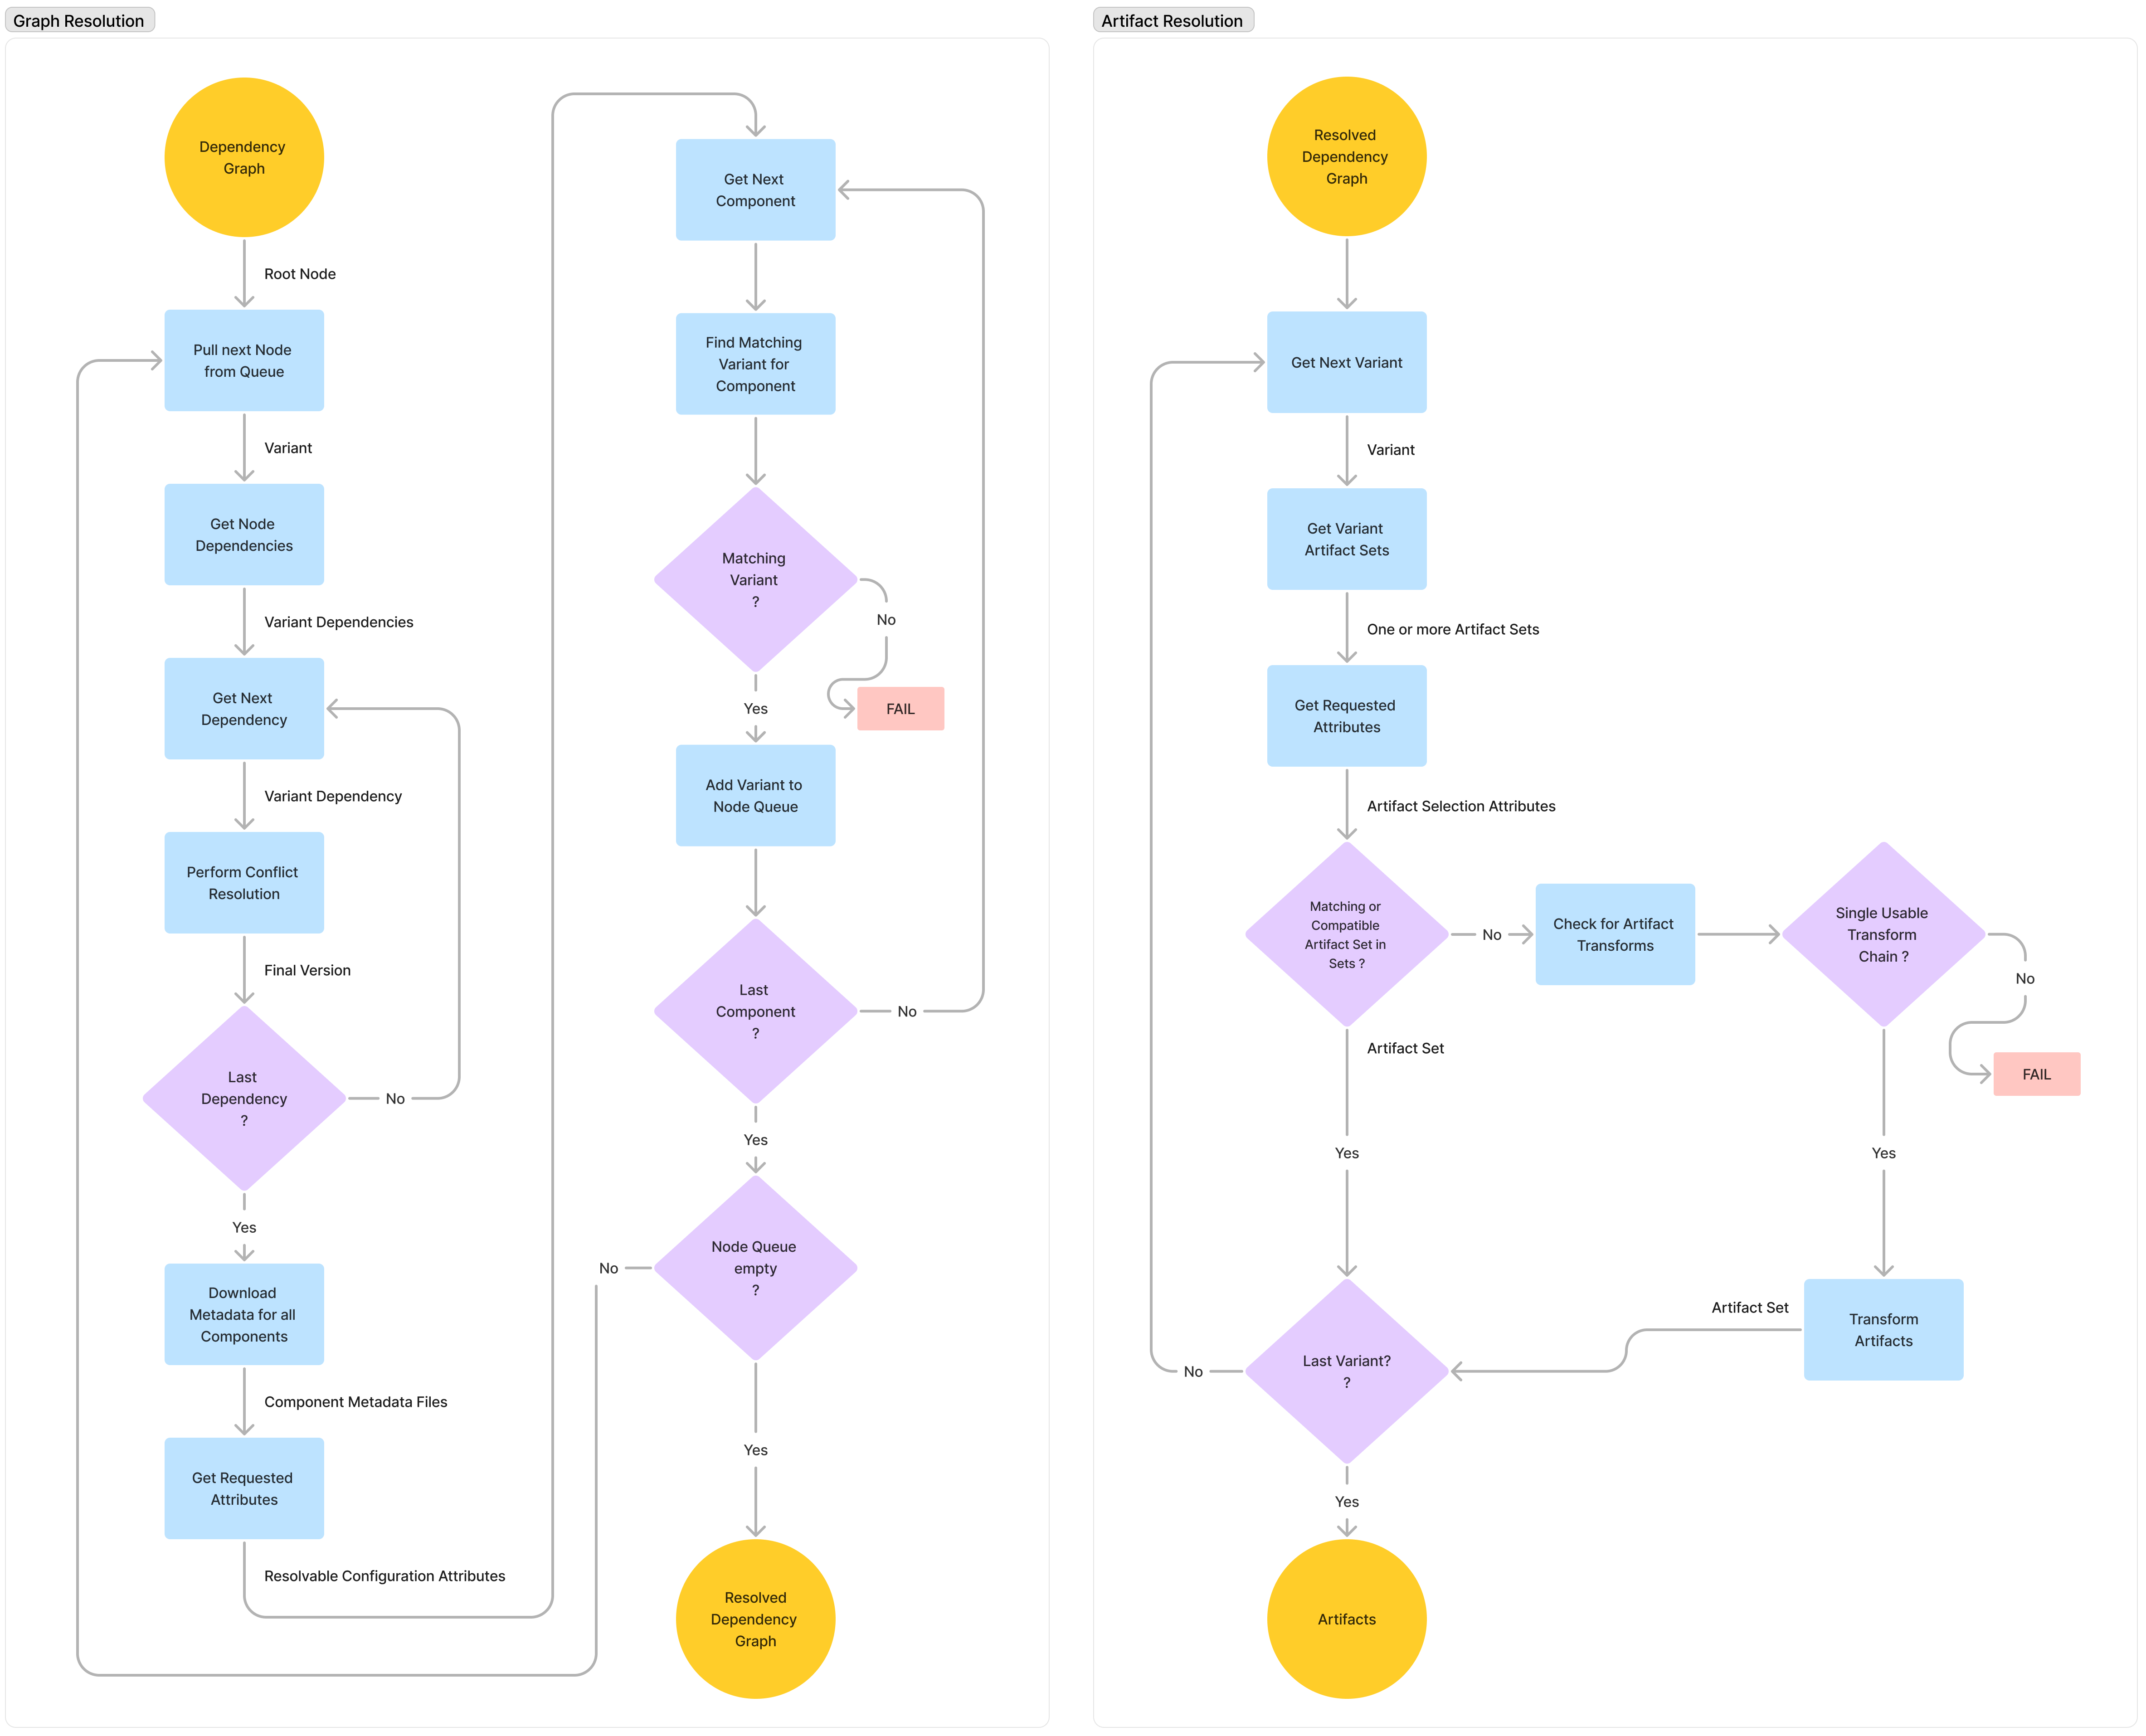
1. Graph Resolution
During the graph resolution phase, Gradle constructs a dependency graph, which models the relationships between different components and their variants.
See Graph Resolution to learn more.
2. Artifact Resolution
Once the dependency graph is resolved, the artifact resolution phase determines which artifacts (i.e. files) need to be downloaded or retrieved for each variant.
See Artifact Resolution to learn more.
Next Step: Learn about Graph Resolution >>