Plugin Basics
Gradle is built on a flexible plugin system.
Out of the box, Gradle provides core infrastructure like dependency resolution, task orchestration, and incremental builds. Most functionality — like compiling Java, building Android apps, or publishing artifacts — comes from plugins.
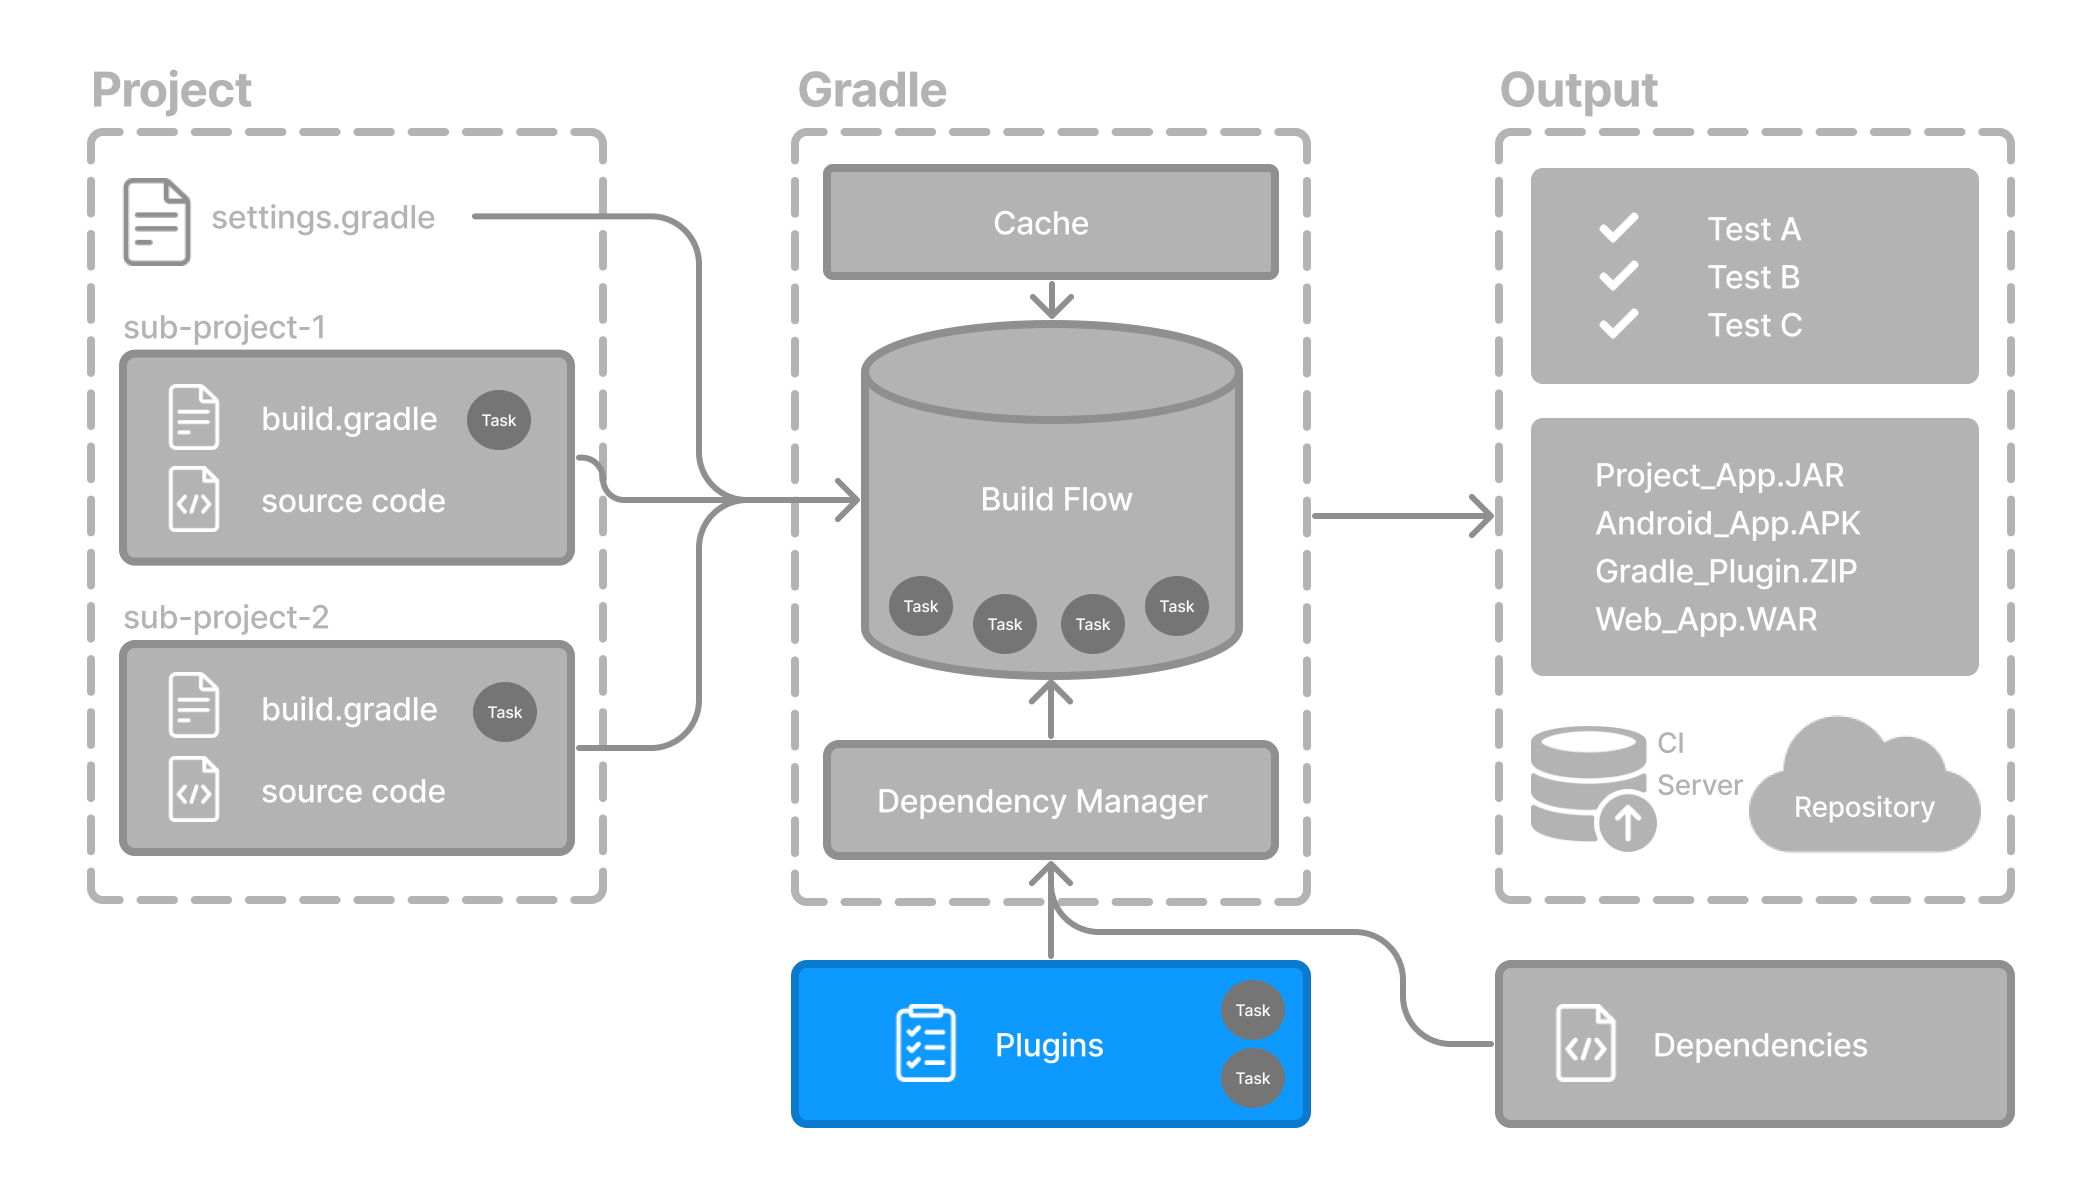
A plugin is a reusable piece of software that provides additional functionality to the Gradle build system. It can:
-
Add new tasks to your build (like
compileJavaortest) -
Add new configurations (like
implementationorruntimeOnly) -
Contribute DSL elements (like
application {}orpublishing {})
Plugins are applied to build scripts using the plugins block (Kotlin DSL or Groovy DSL), and they bring in all the logic needed for a specific domain or workflow.
Common Plugins
Here are some popular plugins and what they do:
- Java Library Plugin (
java-library) -
Compiles Java source code, generates Javadoc, and packages classes into a JAR. Adds tasks like
compileJava,javadoc, andjar. - Google Services Plugin (
com.google.gms.google-services) -
Configures Firebase and Google APIs in Android builds. Adds DSL like
googleServices {}and tasks likegenerateReleaseAssets. - Gradle Bintray Plugin (
com.jfrog.bintray) -
Publishes artifacts to Bintray (or other Maven-style repositories) using a
bintray {}configuration block.
Applying Plugins
Applying a plugin to a project allows the plugin to extend the project’s capabilities.
You apply plugins in the build script using a plugin id (a globally unique identifier / name) and a version:
plugins {
    id("«plugin id»").version("«plugin version»")
}
For example:
plugins {
    id("java-library")
    id("com.diffplug.spotless").version("6.25.0")
}
This tells Gradle to:
-
Apply the built-in
java-libraryplugin, which adds tasks for compiling Java, running tests, and packaging libraries. -
Apply the community-maintained
spotlessplugin (version6.25.0), which adds code formatting tasks and integrates tools likektlint,prettier, andgoogle-java-format.
Plugin Distribution and Availability
Gradle plugins come from different sources, and you can choose the right type depending on your use case.
1. Core Plugins
Gradle Core plugins are a set of plugins that are included in the Gradle distribution itself. These plugins provide essential functionality for building and managing projects.
Core plugins are unique in that they provide short names, such as java-library for the core JavaLibraryPlugin.
You can apply them by ID with no extra setup:
plugins {
    id("java-library")
}
These plugins are maintained by the Gradle team. See the Core Plugin Reference for a full list.
2. Community Plugins
Community plugins are plugins developed by the Gradle community, rather than being part of the core Gradle distribution. These plugins provide additional functionality that may be specific to certain use cases or technologies.
Gradle’s plugin ecosystem includes thousands of open-source plugins shared by the community. These are typically published to the Gradle Plugin Portal and can be applied by ID and version:
plugins {
    id("org.springframework.boot").version("3.1.5")
}
Gradle will automatically download the plugin when the build runs. See the Gradle Plugin Portal to search for a plugin.
3. Custom / Local Plugins
You can also write your own plugins — either for use in a single project or shared across multiple projects in the same build.
Custom plugins are typically written in Java, Kotlin, or Groovy and follow the same structure as published plugins.
They are normally applied by name:
plugins {
    id("my.custom-conventions")
}
Next Step: Learn about Build Scan >>